

Moving a Piano: DIY Safety Checklist and When to Hire Pros

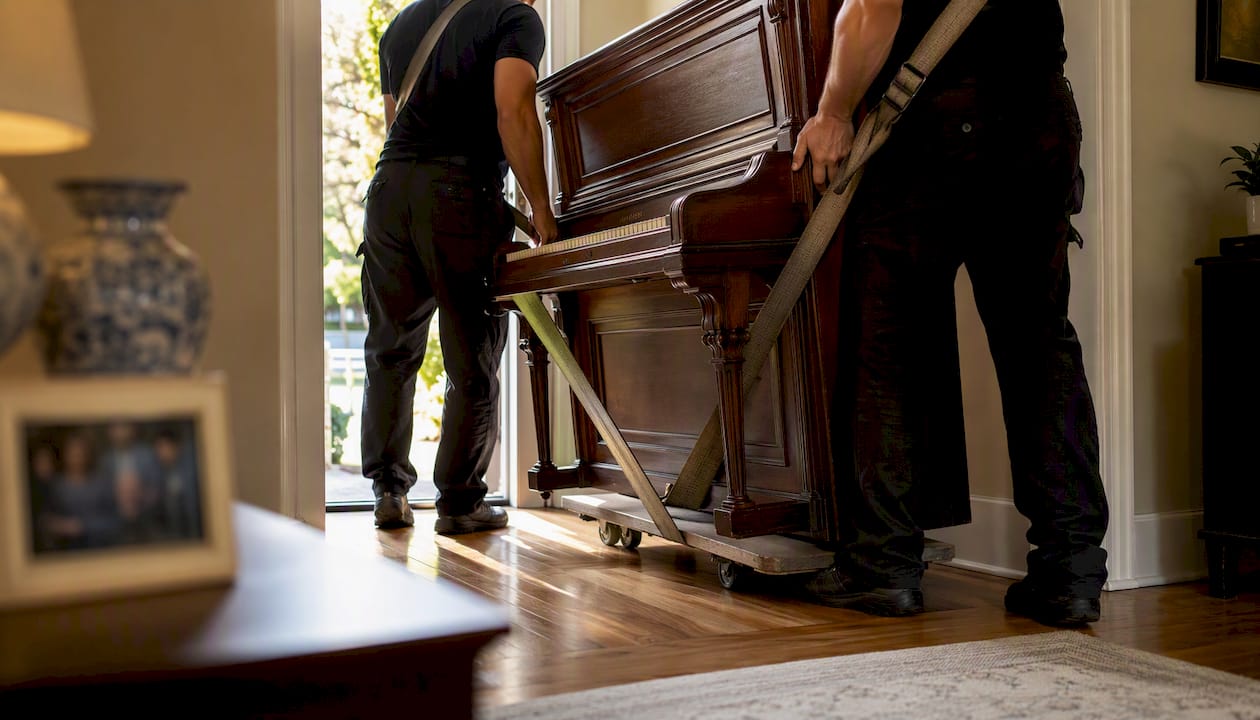
Most homeowners can safely move an upright piano across a single floor with proper equipment and at least three helpers. The moment stairs, tight corners, a grand piano, or a long drive enter the picture, hiring professional piano movers is the smarter call. Professional piano moving in the U.S. typically costs a few hundred dollars for a local move, with stairs, piano type, and distance pushing that number higher. The single most important safety rule before you touch the instrument: never lift or tilt a piano using its decorative front legs. Those legs are ornamental on most uprights and will snap under load, sending several hundred pounds straight down.
Key Takeaways
Moving a piano safely comes down to honest planning: assess the route, use rated equipment, and hire professionals whenever stairs, a grand piano, or limited helpers make DIY genuinely risky.
Point | Details |
DIY is reasonable for simple moves | Flat moves with 3+ helpers, proper equipment, and no stairs are manageable for most homeowners. |
Use rated equipment only | Piano boards and straps rated for 800–1,000+ lbs are required; household straps are not a safe substitute. |
Stairs change the calculation | Any move involving more than one flight of stairs warrants professional movers with a piano board and ramp. |
Local pro moves cost $250–$600 | Distance, piano type, and stairs drive the final price; grands and multi-flight moves cost more. |
Atlaskings provides itemized piano moving | Atlaskings offers transparent, itemized pricing for piano transport, lift, and in-home placement services. |
Table of Contents
How do you plan the route before moving a piano?
Planning the path is where most DIY piano moves succeed or fail. A piano that fits through your living room doorway may not clear the hallway turn, and discovering that mid-move is dangerous.
Your pre-move measurement checklist:
Measure the piano’s height, width, and depth with the lid closed and any music stand removed.
Measure every doorway opening (width and height clearance) along the planned route.
Measure stairway width, landing dimensions, and any banister protrusions.
Check the truck loading height and compare it to your ramp angle.
Walk the full route at both origin and destination, noting tight corners and floor transitions.
Identify a backup route in case the primary path has an unexpected obstacle.
Mapping the route and measuring every doorway and stairway before you start prevents most DIY mishaps. If a doorway is within an inch or two of the piano’s width, consider whether removing the door from its hinges buys you the clearance you need. A door frame that takes a hard hit from a piano corner can crack or shift, and interior door damage is one of the most common and avoidable consequences of moving large items through tight openings.
Once you have measurements, protect the environment. Lay floor runners or cardboard on hardwood and tile. Pad door frames with moving blankets or foam corner protectors secured with painter’s tape.
Minimum helper recommendations:
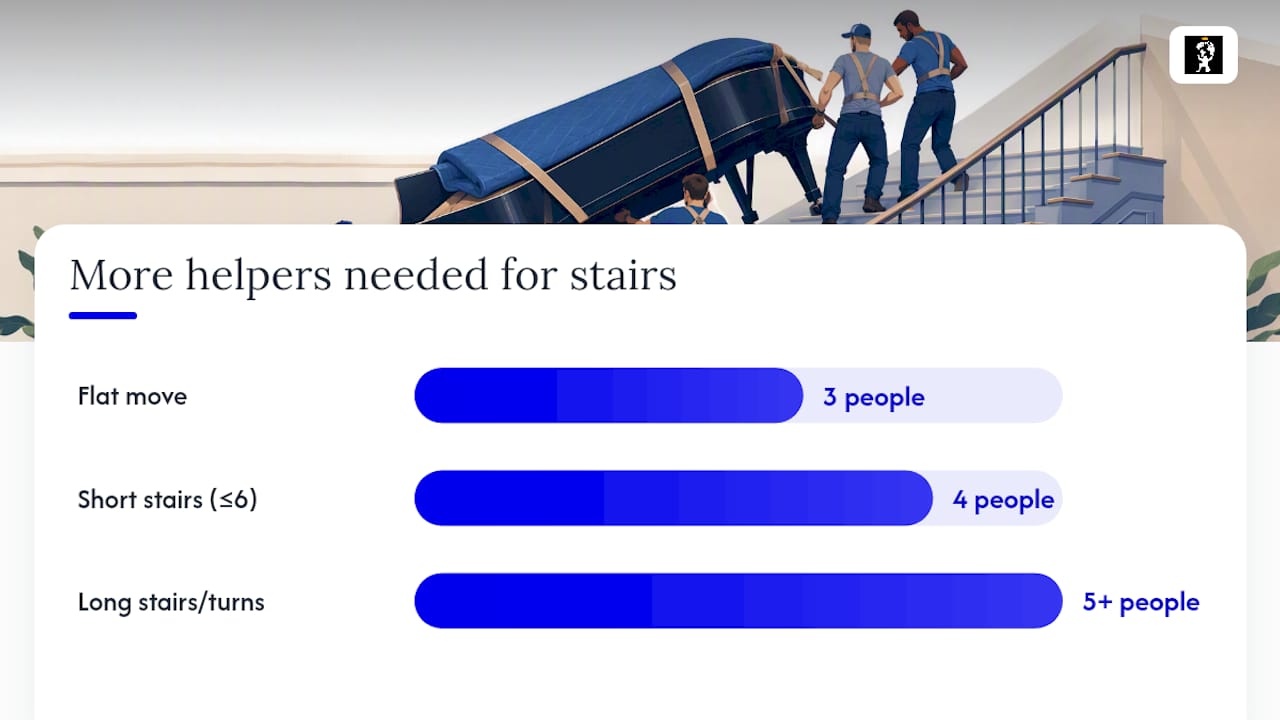
Flat move, no stairs: 3 people minimum (2 to guide, 1 to steer the dolly)
Short flight of stairs (up to 6 steps): 4 people
Long staircase or multiple turns: 5 people, plus a spotter at each landing
Pro Tip: Photograph the piano’s serial number plate (usually inside the lid on an upright) and document any existing scratches or finish damage before the move. If anything happens in transit, that documentation supports an insurance claim.
What equipment do you need for a safe piano move?
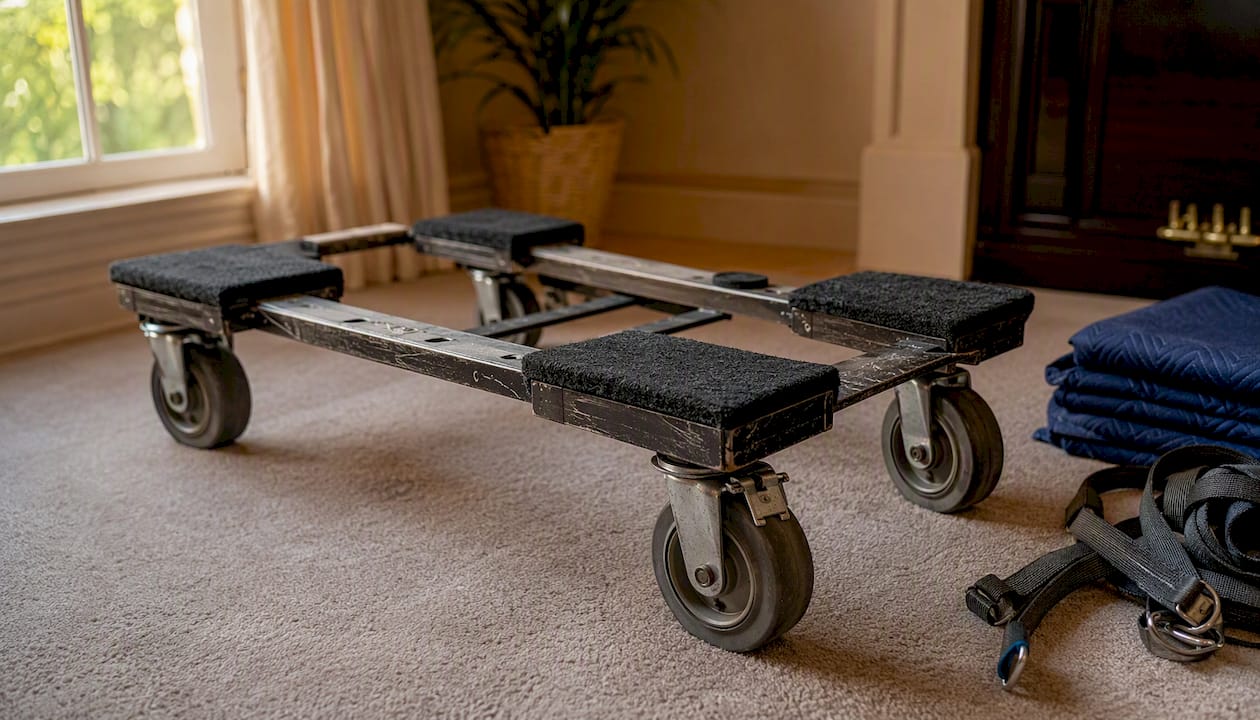
The right gear is what separates a controlled move from a dangerous one. Dollies, piano boards, moving blankets, ratchet straps, and ramps are the core equipment; heavier pianos need dollies with soft rubber wheels at least 4 inches in diameter and high load ratings.
Essential piano moving equipment:
Piano moving board (skid board): A reinforced wooden or metal board that the piano rides on. Rent this rather than buying.
Carpeted or rubber-cap piano dolly: Designed to hold the piano’s weight without scratching floors. Soft rubber wheels are non-marking and handle transitions better than hard plastic.
Heavy moving blankets: At least 4–6 to wrap the full body and protect the finish. These are worth buying if you move large items regularly, or rent a bundle from a truck rental company.
Ratchet tie-down straps: Use these to secure blankets to the piano and to anchor the piano in the truck. Professional-grade piano boards and straps are rated for loads often exceeding 800–1,000 lbs; use rated gear, not household straps, for heavy uprights and grands.
Floor runners: Protect hardwood and tile during the roll.
Corner protectors: Foam or cardboard corners taped over the piano’s edges before wrapping.
Lifting straps: Forearm or shoulder straps reduce hand fatigue and improve control on short lifts.
Loading ramp: A truck ramp or aluminum loading ramp is far safer than dead-lifting into a truck bed. Rent from truck rental companies or equipment rental shops.
Rent vs. buy: The piano board, dolly, and ramp are worth renting unless you move pianos regularly. Moving blankets, straps, and corner protectors are inexpensive to buy and useful for other moves. Truck rental companies like U-Haul and Penske typically carry moving blankets and ramps as add-ons. Local equipment rental shops often stock piano dollies and boards.
Specialized tools such as the HeftMate Pianolift and dollies with brakes reduce manual lifting and improve control for professional teams. For a DIY move, a standard piano dolly with locking wheels is the practical equivalent.
How do you move an upright piano step by step?
An upright piano weighs anywhere from 300 to 800 lbs depending on the model. The process below assumes a flat or gently ramped move with no stairs.
Preparation:
Clear the entire route of rugs, furniture, and obstacles.
Protect floors with runners and pad all door frames.
Close and latch the keyboard lid. If it doesn’t latch, tape it shut with painter’s tape.
Secure the pedals with a folded moving blanket tucked underneath.
Wrapping the piano:
Drape moving blankets over the top, sides, and back, overlapping edges by at least 6 inches.
Wrap corner protectors over each corner before the final blanket layer.
Secure blankets with ratchet straps around the body. Snug is correct; over-tight straps can dent the case.
Getting it on the dolly:
Tilt the piano gently backward onto its rear structural frame. Never tilt it forward onto the decorative front legs. The front legs on most uprights are ornamental and will not support the instrument’s weight.
Slide the dolly under the rear base while two helpers hold the tilt.
Lower the piano onto the dolly and confirm all four wheels are on the floor before releasing.
Loading into the truck:
Position the ramp at the truck’s loading door at the shallowest angle possible. Choosing a vehicle with a loading height close to the origin floor minimizes the vertical lift required.
Roll the piano up the ramp with one person guiding from behind and one steadying from the side.
Never let the piano roll freely on a ramp. Maintain hand contact and control at all times.
Once inside the truck, roll it to the front wall and position it upright.
Common mistakes to avoid:
Lifting by the decorative legs
Attempting stairs without a ramp or enough helpers
Using household bungee cords instead of rated ratchet straps
Moving the piano on its castors over long distances without a dolly (castors are not designed for that load)
Pro Tip: Tape a folded moving blanket between the piano and any wall or truck surface it rests against. Even a short drive with unpadded contact will scuff the finish.
How do you move a grand piano safely?
Grand pianos are a different category of challenge. They weigh 500–1,200 lbs, their center of gravity shifts dramatically once the legs are removed, and the body must travel on its side on a skid board. Incorrect sequencing during disassembly risks both damage to the piano and injury to the people moving it. For most homeowners, a grand piano move warrants professional help.
Disassembly sequence:
Remove the music desk (the stand that holds sheet music) and wrap it separately.
Open the lid and remove it if it detaches; otherwise prop it open and secure it with a strap.
Remove the leg closest to the keyboard first. Have two people support the piano body as each leg comes off.
Remove the pedal lyre (the assembly connecting the pedals to the body). This usually requires a wrench.
Lower the piano body onto a padded grand piano skid board with the flat side down.
Pack legs and the pedal lyre separately in padded blankets or cases and label each piece.
Once on the skid board, the body is wrapped in moving blankets and strapped to the board. Two dollies support the board for rolling.
When a DIY grand move might be acceptable: A short, flat move with no stairs, wide doorways, and a team of at least four experienced people can work. The key word is experienced. If no one on your team has moved a grand before, the disassembly sequence alone creates real risk.
Clear reasons to hire pros for a grand:
Any stairs at origin or destination
Multi-flight moves or elevator-only buildings
Doorways under 36 inches wide
Long-distance transport
Fewer than four available helpers
Professional movers carry specialized rigging, trucks with ramps, and insurance to reduce liability on difficult jobs. For a grand piano, that insurance coverage is worth the cost alone.
Can you lay a piano on its side for transport?
The short answer is: not if you can avoid it. Laying an upright or grand piano on its side is widely discouraged for amateurs; professionals may use the technique for narrow passages but only with piano shoes or skid boards to prevent damage to the case and internal action.
Why side transport causes damage:
The piano’s internal action (hammers, dampers, strings) is designed to operate vertically. Sustained horizontal positioning can shift felt components and misalign the action.
The case and finish are vulnerable to pressure points when the full weight rests on one side.
Restringing or action regulation after transport damage is expensive.
If side transport is genuinely unavoidable:
Keep the duration as short as possible.
Use a padded piano skid board so the weight distributes across the board, not the case.
Pad every contact point with heavy moving blankets.
Re-upright the piano as soon as you clear the obstacle.
Pro Tip: If a doorway is the obstacle, check whether removing the door and its hinges gives you the extra inch or two you need. That 10-minute fix is far less risky than tipping a piano onto its side.
How do you move a piano on stairs safely?
Stairs are where DIY piano moves become genuinely dangerous. A piano that tips on a staircase cannot be stopped by hand.
Move type | Minimum helpers | Key equipment |
Flat move, no stairs | 3 | Dolly, blankets, ratchet straps |
Short flight (up to 6 steps) | 4 | Piano board, ramp or stair ramp, straps |
Long staircase or multiple turns | 5+ | Piano board, heavy-duty ramp, spotter at each landing |
Step checklist for stair moves:
Assess every step: count them, measure the width, and check landing sizes and banister clearance.
Secure the piano firmly to the piano board with ratchet straps before approaching the stairs.
Use a ramp over the stairs whenever the stair configuration allows. A long aluminum ramp that spans the full flight is safer than moving step by step.
If a ramp is not possible, position the strongest helpers at the bottom (bearing most of the weight) and one person at the top for guidance.
Move one step at a time. Call out each step before moving.
Keep at least one end of the piano or dolly in contact with a surface at all times. A single unsupported moment can cause a violent tip.
Safety warnings: Never attempt a multi-flight stair move without a piano board and rated straps. Never rely on the piano’s own castors for stair movement. Solo lifts on stairs are not safe regardless of the person’s strength.
For anything beyond a short, straight flight, the risk-to-reward calculation shifts clearly toward hiring professionals.
How do you secure a piano in a truck for transport?
Getting the piano into the truck is only half the job. An unsecured piano in a moving truck shifts with every turn and stop.
Anchoring and blocking:
Position the piano upright against the front wall of the truck (the cab-side wall). This is the most stable orientation and puts the piano’s weight against the direction of braking force.
Use E-track anchor points or truck rub rails with rated ratchet straps and multiple tie-down points to prevent lateral movement during highway driving.
Run at least two straps: one across the upper body and one across the lower body. Never run a strap directly over delicate trim, molding, or the keyboard lid. Pad those contact points with folded blankets first.
Block the base with furniture pads or other secured items to prevent forward and backward movement.
Additional transport tips:
Keep padding between the piano and any truck wall or other item it contacts.
Center the piano’s weight in the truck to avoid load imbalance on turns.
Avoid prolonged exposure to extreme heat or humidity during transport. A piano left in a hot truck for hours can experience glue joint failure and finish cracking.
Plan for acclimation time at the destination before tuning or heavy use.
Pro Tip: Drive the first mile slowly and stop once to check that no straps have loosened. Vibration from the road can work a strap loose in the first few minutes of driving.
When should you hire professional piano movers?
Some moves are simply outside the safe range for a DIY team, no matter how careful or strong the helpers are.
Hire professionals when:
The move involves more than one flight of stairs
You’re moving a baby grand or concert grand
Doorways or hallways are under 32 inches wide
The move is long-distance (over 50 miles)
You have fewer than three available helpers
The piano has significant monetary or sentimental value
Your homeowner’s or renter’s insurance does not cover moving damage
Professional piano moving in the U.S. typically costs a few hundred dollars for a local move. Stairs, piano size, and distance push the price higher. A grand piano move with stairs can run $800 or more depending on the market.
Questions to ask prospective movers:
How many piano moves have you completed in the past year?
Do you carry cargo insurance specifically covering pianos, and what is the per-item limit?
Will you provide a binding written estimate, or is your quote hourly?
Do you own a piano board and rated piano dolly, or do you rent equipment?
Can you provide references from recent piano moves?
Who is responsible for damage that occurs during disassembly or reassembly?
Contract and insurance pitfalls: Verify that the mover’s insurance covers the full replacement value of your piano, not just a per-pound depreciated rate. Standard moving insurance often pays as little as $0.60 per pound, which covers almost nothing on a quality instrument. Ask specifically for declared-value or full-value protection. For finding local large-item movers with verified experience, comparing providers before you book saves both money and risk.
Real-world tips from Atlaskings’ 500+ moves
After completing over 500 moves since 2021, the Atlaskings team has developed habits that most DIYers skip, and those habits are often what separates a clean move from a costly one.
What pros do that most DIYers miss:
Photo-document before touching anything. Walk around the piano and photograph every existing scratch, dent, and finish flaw before the move begins. Do the same at the destination. This takes five minutes and is the foundation of any insurance claim.
Check the route twice, move once. Pros measure the route, then physically walk it with the dolly before the piano is on it. Discovering a tight corner with an empty dolly is a minor inconvenience. Discovering it with a piano on the dolly is a crisis.
Protect the finish, not just the structure. Moving blankets protect against impact, but finish damage often comes from friction. Pros use corner protectors under the blankets and check that no strap hardware contacts the case directly.
Ask for itemized quotes. A flat-rate quote that doesn’t specify reassembly, placement, or stair fees can expand significantly on moving day. Request a written itemized estimate that lists every service and any conditional charges.
Specialized lifting tools used by professional teams, including dollies with brakes and piano boards, reduce manual lifting and improve control throughout the move. For a DIY team, the closest equivalent is a quality locking-wheel dolly and a properly rated skid board.
Pro Tip: Ask your mover whether their quote includes placing the piano in its final room position and whether reassembly (for grands) is included. Some movers deliver to the door and stop there.
What should you do after the piano arrives?
The move isn’t finished when the piano reaches its destination. A few quick checks and a waiting period protect both the instrument and your investment.
Arrival inspection checklist:
Remove all blankets and straps and inspect the exterior finish for new scratches or dents. Compare against your pre-move photos.
Open the keyboard lid and check that keys are aligned and none are stuck or chipped.
Press each pedal to confirm it moves freely and returns properly.
Play a few notes across the full range and listen for rattles, buzzes, or dead keys.
If you hear anything unusual, note it immediately and contact a piano technician before the move date fades from memory.
Settling and tuning timeline: Allow an acoustic piano 4–6 weeks to settle in its new environment before scheduling a professional tuning. Temperature and humidity changes cause the soundboard and strings to shift, and tuning too early means the pitch will drift again quickly. Place the piano away from exterior walls, heating vents, and direct sunlight to stabilize its environment faster.
When to call a technician immediately: if keys are stuck, pedals don’t return, or you hear a sharp buzzing that wasn’t there before, don’t wait for the settling period. Some issues, like a shifted bridge or a cracked soundboard, worsen with time.
What moving a piano has taught us
Moving a piano is one of the few household tasks where the gap between “it went fine” and “it went badly” is measured in seconds. The piano tips, or it doesn’t. The leg holds, or it snaps. There is very little middle ground.
What I’ve seen across hundreds of moves is that the mistakes almost never come from a lack of strength. They come from skipping the planning step, underestimating the weight distribution of a grand, or trusting a dolly that wasn’t rated for the load. The homeowners who have the smoothest DIY moves are the ones who treat the planning phase as seriously as the lifting phase.
If you’re on the fence about hiring help, ask yourself one question: what is this piano worth to you, and what is the cost of replacing or repairing it if something goes wrong? For most families, the $300–$500 cost of a professional local move is a straightforward answer.
Atlaskings handles piano moves with transparent, itemized pricing
Piano moving is one of the services where pricing surprises hurt the most. Atlaskings offers in-home delivery and lift services for heavy items including pianos, with itemized pricing that lists every charge before you confirm the booking. No stair fees appearing on moving day, no reassembly charges that weren’t discussed.

Our transport and lift services cover local and multi-city moves, in-home placement, and reassembly for grands. We bring rated piano boards, proper dollies, and the experience of 500+ completed moves to every job. If you’re weighing a DIY move against hiring a team, request an itemized quote from Atlaskings and compare it against the cost of renting equipment and your own time. For most piano moves with any complexity, the numbers are closer than people expect. Get a quote for your piano move and see exactly what’s included before you commit.
Sources
These are the primary references used in this article, each covering a specific aspect of safe piano moving:
Recommended
Comments