

Moving a Treadmill: Safe Step-by-Step Home Guide

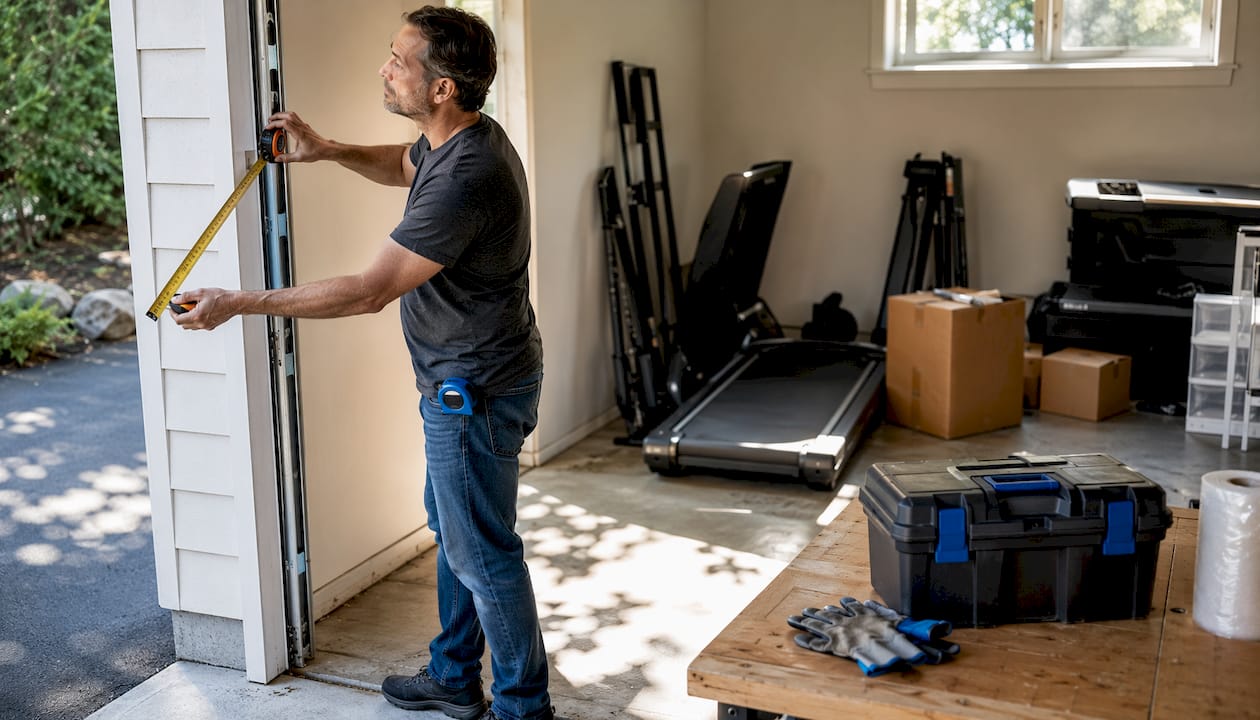
Yes, you can move a treadmill safely. Most home treadmills are quite heavy and large but generally fit through standard doorways and up residential staircases, but only if you measure every clearance point before you lift anything. The single most important first step is not gathering equipment or recruiting helpers. It is measuring.
Before you touch the machine, run through these tasks in order:
Unplug the treadmill and remove the safety key from the console.
Measure the treadmill in its assembled state: length, width, and full height including the console mast. The mast typically adds 30–40" of height and is removed with 4–6 bolts.
Measure every point on the route: doorway widths, hallway widths, stair clear width below the handrail brackets (not at floor level), landing depth, and any ceiling or soffit clearances.
Secure loose parts: coil and tape the power cord, bag all hardware in a labeled zip-lock, and remove or fold the console mast if the ceiling height requires it.
Pro Tip: Always allow an extra 1–2 inches of clearance beyond your measurements. Real openings are consistently smaller than their labeled dimensions once trim, brackets, and handrail hardware are factored in.
Table of Contents
Should you move the treadmill yourself or hire professionals?
The right answer depends on four variables: weight, stairs, helpers, and your comfort with disassembly. Work through these checkpoints before committing to either path.
Does the treadmill weigh more than 300 lbs? If yes, hire professionals. At heavy weights, a DIY stair carry puts everyone at serious injury risk.
Are there stairs involved? A minimum of 3 strong adults is recommended for standard home treadmills on stairs. For commercial-grade units or heavier, 4 people or a motorized stair-climbing dolly is the standard.
Is the landing depth under 36 inches? Tight landings make pivoting a treadmill nearly impossible without detaching the running deck from the base frame. That level of disassembly usually calls for a professional crew.
Do you have fewer than 3 available helpers? Stop here and hire out. Two people carrying a heavy treadmill on a staircase is a recipe for a dropped machine and a back injury.
When DIY works well: folding treadmills on flat routes, short same-floor moves with 3+ helpers, and situations where you can rent a stair-climbing dolly.
When to hire: stair moves with a non-folding unit over 300 lbs, landings under 36" deep, single-story buildings with very narrow hallways, or any move where you cannot confidently assemble a 3-person crew.
On cost: Professional movers charge varying amounts for a treadmill stair move depending on complexity. A stair-climbing dolly rents for a modest daily rate if you choose to handle it yourself with the right equipment. Many professional moving services list gym equipment moving as a standard offering, so finding a crew experienced with treadmills is straightforward.
Pro Tip: Renting a stair-climbing dolly is worth it for a single stair flight. Hiring a crew is worth it for anything more complex. The cost difference between the two is usually under $200, and the injury risk difference is significant.
What do you need to measure before moving a treadmill?
Skipping measurements is the leading cause of failed treadmill moves. The frame gets stuck at handrail-bracket height, not at floor level, because the treadmill travels at that height as it ascends the staircase. Measure at that height, not above the rail.
Measurements to take
Treadmill footprint (assembled): length and width with all parts attached.
Treadmill footprint (folded): length and width in the folded position if applicable.
Full height including console mast: measure from floor to the top of the console.
Doorway clear width: measure inside the frame, not the door slab width.
Hallway width: measure at the narrowest point, including any trim or protruding fixtures.
Stair clear width below handrail brackets: this is the usable width during a carry.
Landing depth: measure from the last riser to the wall or door.
Ceiling and soffit clearances: measure at the lowest overhead point along the entire route.
Typical dimensions at a glance
Measurement | Typical range | Standard residential benchmark |
Assembled length | 64–84" | N/A |
Assembled width | 28–40" | Doorway clear width: — |
Folded length | 35–50" | N/A |
Weight | 200–350 lbs | N/A |
Console mast height added | 30–40" | — |
Stair clear width (below brackets) | Varies | 36" minimum common guidance |
Landing depth | Varies | 36" minimum common guidance |
Sketch the route on paper and mark every pinch point. A quick diagram takes five minutes and can prevent a two-hour jam at a doorway.
Pro Tip: Measure stair width at three heights: at floor level, at handrail height, and at the height of the treadmill frame when tilted. The narrowest of those three numbers is your real working width.
What tools and equipment do you need for a safe move?
Having the right gear on hand before you start prevents improvised decisions mid-carry, which is when most injuries happen.
Essential equipment
Appliance or furniture dolly: rated for at least 600 lbs to give a safe margin above the treadmill’s weight. A two-wheel hand truck works for flat routes; a four-wheel platform dolly is more stable for longer distances.
Moving straps (forearm or shoulder style): distribute weight across your body rather than concentrating it in your hands and lower back.
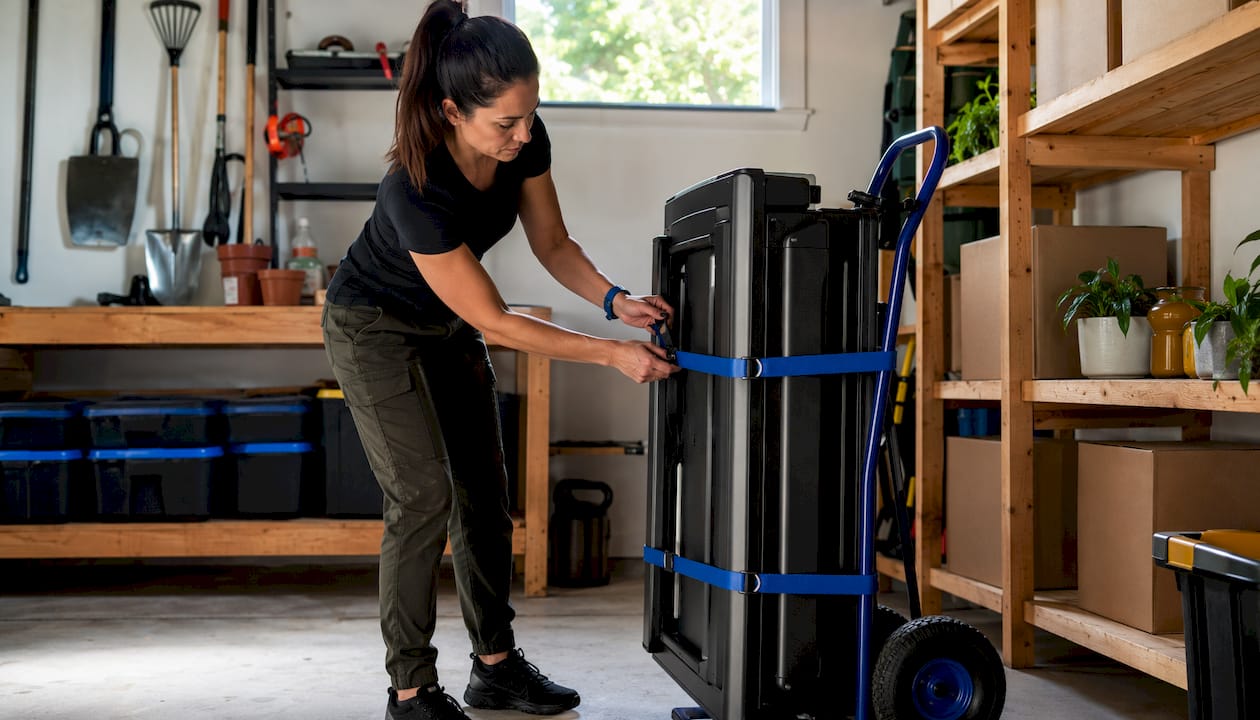
Ratchet straps: secure the treadmill to the dolly and to the vehicle anchor points during transport.
Moving blankets: wrap the console, frame, and deck to prevent scratches and dings. A slipping heavy treadmill can gouge hardwood, crack tile, or damage subfloor, so blankets on the floor along the route matter as much as blankets on the machine.
Corner protectors: protect wall corners and door frames during the carry.
Floor runners or plywood sheets: lay these along the path to protect flooring under the dolly wheels.
Work gloves: improve grip and protect hands from pinch points.
Wrenches and Allen keys: for removing the console mast and any guard components.
Optional but worth having
Stair-climbing dolly (manual or electric): an electric model handles loads up to approximately 500 lbs and dramatically reduces the physical demand on your crew.
Appliance ramp: useful for loading into a truck without a lift gate.
Furniture sliders: helpful for repositioning the treadmill on hard floors without lifting.
Safety note: Never attempt a stair carry without gloves. Pinch points between the frame and handrail are the most common source of hand injuries during treadmill moves. Assign one person as a dedicated spotter whose only job is to watch for hazards and call stops.
A standard appliance dolly rated for heavy loads costs a moderate amount to rent for a day at most equipment rental locations. That is a small investment relative to the cost of a floor repair or an emergency room visit.
How do you move a treadmill step by step?
Follow this sequence in order. Skipping steps, particularly the prep and packing steps, is where most damage occurs.
Preparation
Unplug the machine and remove the safety key. Coil the cord and secure it with a zip tie or tape.
Remove the console mast if ceiling clearances require it. Use the appropriate Allen key or wrench, bag all bolts in a labeled zip-lock, and set the mast aside wrapped in a moving blanket.
Fold the treadmill if it has a folding mechanism and the folded dimensions clear the route.
Secure the belt with a strip of tape across the deck to prevent it from rolling during the carry.
Remove any loose accessories: water bottle holders, tablet mounts, resistance bands. Bag and label everything.
Packing and protection
Wrap the console, frame rails, and deck in moving blankets and secure with packing tape or bungee cords. Do not tape directly to painted or plastic surfaces.
Lay floor runners or plywood along the entire route before you start moving.
Place corner protectors on any door frames or wall corners along the path.
Lifting and carrying
Assign roles: one lead carrier at the front (motor end), one at the rear, and one spotter. The spotter calls all stops and watches for hazards.
Orient the motor end toward the bottom when carrying upstairs. The motor end is the heavier end, and placing it lower keeps the center of gravity controlled and lets your strongest carrier manage the heaviest load.
Lift with your legs, not your back. Coordinate with a verbal count before every lift and every set-down.
Move at a slow, deliberate pace. Rushing is the primary cause of drops.
Loading onto the dolly
Tip the treadmill onto the dolly with two people controlling the tilt and one steadying the dolly. Center the load over the axle.
Strap the treadmill to the dolly with ratchet straps at two points: one near the top and one near the base.
Roll through doorways slowly, tilting the dolly back slightly to clear thresholds.
Vehicle loading and securement
Use a ramp or lift gate to load into the vehicle. Never lift a 250+ lb treadmill into a truck bed without mechanical assistance.
Stand the treadmill upright or lay it on its side per the manufacturer’s recommendation. Most treadmills transport best on their side with the motor end protected.
Anchor with ratchet straps to the vehicle’s tie-down rings at two or more points. Add blanket padding between the machine and any metal vehicle surfaces.
Pro Tip: A cargo van or small box truck is far preferable to an open pickup bed for any move longer than a few miles. Vibration and road debris on an open bed can damage the console and belt even with blankets in place.
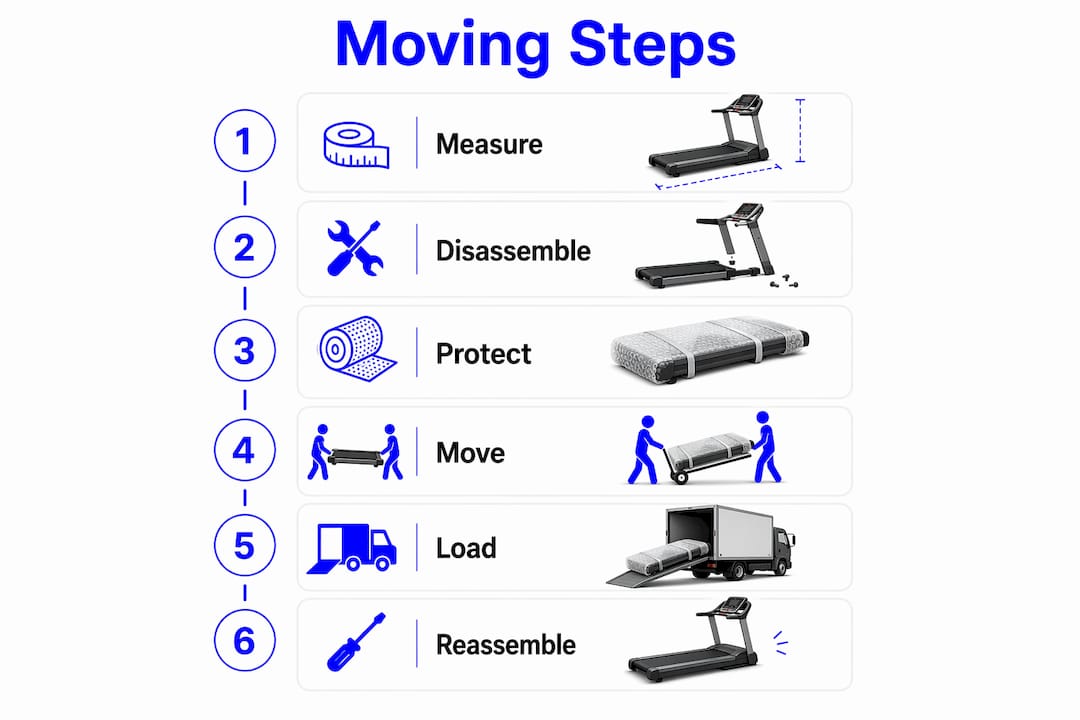
For reassembly, Treadmill Doctor recommends a four-step approach: separate the top pedestal from the base, wrap components in blankets, carry sections with assistance, then reassemble and test. Following that sequence in reverse gives you a reliable post-move checklist.
How do you move a treadmill upstairs or through tight spaces?
Stairs are where most treadmill moves go wrong, and where the decision to hire professionals becomes most defensible. Use these criteria before attempting a stair carry.
When to hire for stair moves
The treadmill weighs more than 300 lbs (commercial-grade units).
The landing depth is under 36 inches and the treadmill cannot be pivoted without detaching the deck from the base frame.
You have only one or two helpers available.
The staircase has a turn mid-flight.
Stair carry technique
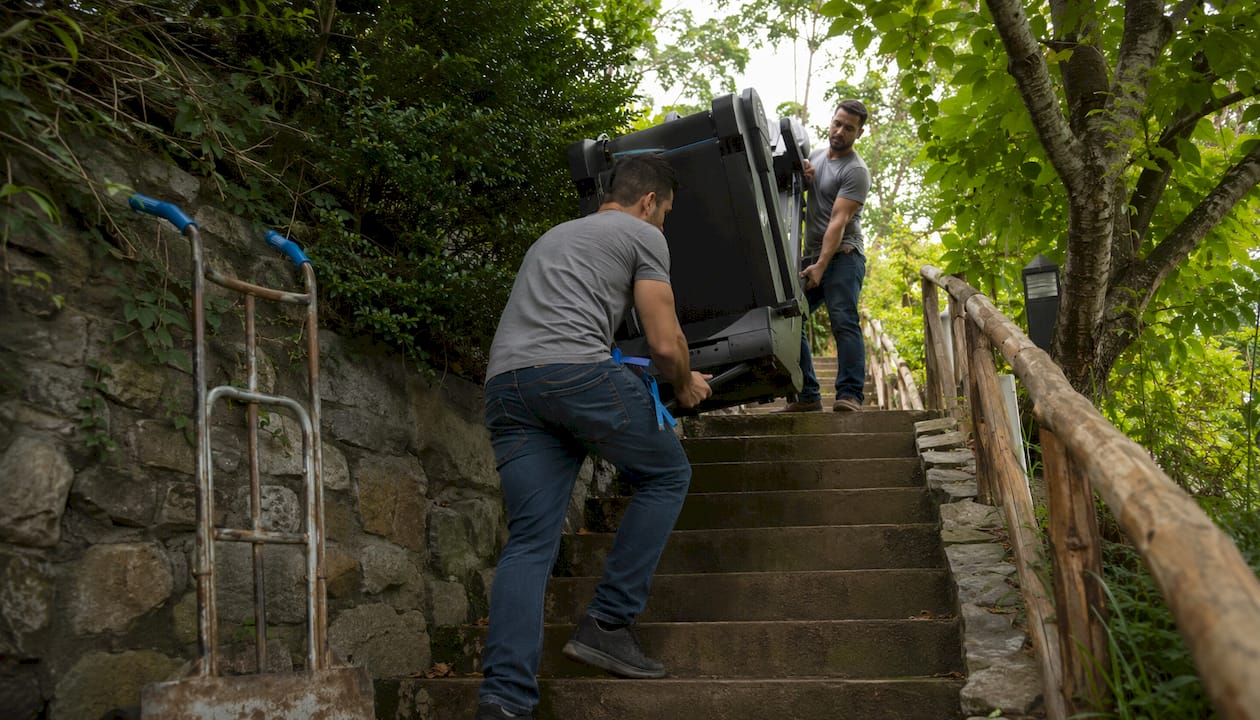
Motor end down, always. The person at the bottom of the staircase bears the majority of the load on an incline, supporting 60–70% of the weight. Assign your strongest carrier to that position.
Use a spotter at the bottom whose only job is to watch the lower carrier’s footing and call stops.
Tilt diagonally on landings to navigate turns. If the landing is too tight for a straight pivot, you may need to detach the running deck from the base frame before attempting the turn.
Move one step at a time. Set the machine down on each step, confirm footing, then continue.
Stair-climbing dolly workflow
A manual stair-climbing dolly uses a tri-star wheel configuration to walk up stairs one step at a time. An electric model handles loads up to approximately 500 lbs with far less physical effort. Strap the treadmill securely at two points before attempting any stair climb with a dolly, and keep the spotter at the bottom throughout.
Pro Tip: If you are measuring stair width and the dimension below the handrail bracket is very narrow, stop planning a DIY carry. That tight width makes a safe two-person carry nearly impossible with a standard treadmill frame.
Doorway clearance is a related concern. Common door frame measurement errors often cause people to underestimate how much the trim and stop molding reduce the actual clear opening. Always measure inside the stop molding, not the door slab.
How do you load and transport a treadmill safely?
Getting the treadmill into a vehicle without damage requires the same deliberate approach as the carry itself.
Loading checklist
Use a loading ramp rated for the treadmill’s weight. Position the ramp at a shallow angle to reduce the force needed to push the dolly up.
Roll the dolly up the ramp front-first (motor end first) with one person guiding from behind and one steadying from the side.
Center the treadmill in the cargo area, away from the wheel wells and any hard protrusions.
Block the dolly wheels with a wedge or tie-down to prevent rolling during transit.
Strapping and padding
Place ratchet straps at two points: one across the upper frame and one across the base. Route straps around the frame, not across the belt or console.
Pad the motor end with a folded moving blanket before strapping. The motor housing is the most expensive component to repair.
Add padding between the treadmill and any metal cargo walls or shelving.
Vehicle choice
A cargo van or small box truck protects the machine from road debris, weather, and vibration far better than an open pickup bed. For moves longer than 10–15 miles, the enclosed vehicle is the right choice. For short same-neighborhood moves, a pickup with blankets and secure straps can work if the weather is clear.
Pro Tip: For any move involving storage, even short-term, clean the belt and deck before wrapping the machine. Moisture trapped under a blanket against a dirty belt can cause mold or belt degradation within a few weeks. Lubricate the deck per the manufacturer’s spec before wrapping for long-haul transport.
Atlaskings’s transport service uses enclosed vehicles with anchor points and trained crews for exactly this kind of single-item move, which removes the vehicle-selection decision entirely.
How do you reassemble and test the treadmill after the move?
Reassembly done carelessly undoes all the care taken during the carry. Follow this sequence before anyone steps on the belt.
Reassembly steps
Position the base on a level surface. Use a bubble level to confirm. An unlevel treadmill causes belt drift and uneven wear.
Reattach the console mast. Torque all bolts to the manufacturer’s specification, not just hand-tight. A loose mast vibrates and can work free during use.
Reconnect all console cables before securing the mast fully. It is much harder to reach cable connectors once the mast is bolted down.
Reinstall the safety key and any guard components.
Confirm the folding lock engages fully if the treadmill has a fold mechanism.
Post-move checks
Belt alignment: look down the center of the belt from the rear. It should run straight without drifting left or right. Most treadmills have rear-roller adjustment bolts for tracking correction.
Belt tension: press down on the center of the belt. It should lift no more than 2–3 inches. Adjust the rear roller bolts evenly if tension is off.
Test at walking speed first: run the belt at 2–3 mph for two minutes and listen for unusual noises, grinding, or vibration.
Check for loose wiring along the frame and console connections.
Safety callout: Wait at least one hour after the move before running the treadmill at speeds above 4 mph. Heavy jostling during transport can shift internal components, and a slow-speed test gives you time to catch problems before they become expensive ones.
The Treadmill Doctor’s reassembly guidance emphasizes testing at low speed before full use, which aligns with this post-move protocol.
What mistakes cause the most damage when moving a treadmill?
Most treadmill move failures trace back to a short list of avoidable errors.
Common mistakes
Skipping measurements: the frame gets stuck at handrail-bracket height, not at floor level. Measure at the height the frame actually travels.
Leaving the console mast attached: a mast that adds 30–40" of height will hit ceiling overhangs, stair soffits, and low beams. Remove it before the carry.
Too few helpers: two people carrying 250 lbs on stairs is unsafe. Three is the minimum for standard home treadmills.
No floor protection: a dropped or dragged treadmill can gouge hardwood floors, crack tile, and damage subfloor. Moving blankets, cardboard, or plywood along the route are not optional.
Incorrect strap placement: straps routed across the belt or console can crack plastic housings. Route straps around the frame only.
Rushing: most drops happen when someone tries to speed up mid-carry. Slow and deliberate wins every time.
Red flags during the move
Stop immediately if:
One helper loses their grip or footing.
The treadmill begins to pivot or tip unexpectedly.
You feel the load shifting on the dolly.
Any part of the frame makes contact with a wall or stair riser under pressure.
If any of these happen, lower the machine to the nearest stable surface, re-evaluate the route, and call a professional crew if the path forward is unclear. A floor repair after a dropped treadmill can run several hundred dollars for hardwood. A back injury costs far more.
How does Atlaskings handle treadmill moves?
Atlaskings has completed over 500 moves since 2021 as a family-run service, and single-item moves like treadmills are a core part of that work. The crew arrives with dollies, moving straps, floor protection, and the experience to assess a stair route or tight hallway before the first lift.
What the service covers
Disassembly of the console mast and any removable components.
Padding and wrapping of all parts before the carry.
Stair and doorway navigation with trained crew members.
Reassembly and placement at the destination.
Flat-rate and itemized pricing with no hidden fees, so you know the cost before the crew arrives.
What to tell Atlaskings when you book
Treadmill dimensions and weight (check the owner’s manual or the manufacturer’s website).
Number of stair flights and landing depth at each turn.
Any known obstructions: low ceilings, narrow doorways, tight hallways.
Destination placement: where the treadmill is going and whether it needs to be reassembled there.
Providing those details upfront means the crew brings exactly the right equipment and can give you an accurate quote rather than a range.
Pro Tip: Take photos of your staircase and the narrowest doorway on the route before you call. Sending those photos with your booking request gives the crew a clearer picture than measurements alone and speeds up the quoting process.
Atlaskings’s small-move service is designed for exactly this kind of single-item job. You get a trained crew, the right equipment, and transparent pricing without booking a full moving truck.
Key Takeaways
Moving a treadmill safely comes down to measuring every clearance point first, assembling the right equipment and crew, and knowing when the job calls for professional help rather than a DIY attempt.
Point | Details |
Measure before anything else | Check stair width below handrail brackets, landing depth, and ceiling clearances before you lift. |
Team size is non-negotiable | A minimum of 3 adults is recommended for standard home treadmills (200–250 lbs) on stairs; heavier units (over 300 lbs) need 4 or a motorized dolly. |
Motor end goes down on stairs | Orient the heavier motor end toward the bottom so the strongest carrier controls the most weight. |
Protect floors and walls | Lay plywood or moving blankets along the entire route before rolling the dolly. |
Atlaskings for professional moves | Atlaskings offers flat-rate treadmill moves with disassembly, padding, and reassembly for single-item jobs. |
The part most people underestimate
The measurement step feels like a formality until you are standing on a landing with a 280 lb treadmill wedged against a soffit. What actually separates a smooth move from a failed one is not strength or equipment. It is the ten minutes spent with a tape measure before anyone touches the machine.
People consistently underestimate how much the handrail brackets reduce usable stair width, and they overestimate how much a strong team can compensate for a route that simply does not fit. The physics do not negotiate. If the frame is wider than the clear opening at bracket height, no amount of effort gets it through.
The other thing worth saying plainly: hiring professionals for a stair move is not a concession. It is the right call for a large percentage of home treadmill moves, and the cost of a professional crew is almost always less than the cost of a floor repair or a medical bill. Knowing when to make that call is part of moving smart.
Atlaskings takes the lift off your hands
Moving a treadmill on your own is manageable for flat, short routes with the right crew. For stair moves, tight hallways, or any situation where the weight or complexity puts your floors and your team at risk, Atlaskings is the practical alternative.

Atlaskings’s in-home delivery and treadmill move service covers disassembly, padding, stair navigation, and reassembly at the destination, with flat-rate pricing so there are no surprises on the day. The crew brings dollies, straps, and floor protection. You bring the measurements and the destination address.
To get started, visit Atlaskings’s small-move booking page, share your treadmill dimensions and route details, and get a quote before the crew arrives. No guesswork, no last-minute add-ons.
Useful sources and further reading
ItemFits Stair Calculator: plug in your treadmill dimensions and stair measurements to get a fit verdict before the move.
Extra Space Storage moving guide: practical floor-protection and packing steps from a widely referenced moving resource.
Elite Treadmills stair guide: explains the handrail-bracket measurement issue and why it causes most stair jams.
Treadmill Doctor move guide: hands-on disassembly and reassembly sequence from a treadmill repair specialist.
WikiHow treadmill move: step-by-step visual guide covering dolly use, furniture sliders, and basic carry technique.
One Day Doors & Closets: door frame measurement mistakes: explains why doorway clear widths are often smaller than expected once trim and stop molding are accounted for.
Recommended
Comments